Introduction
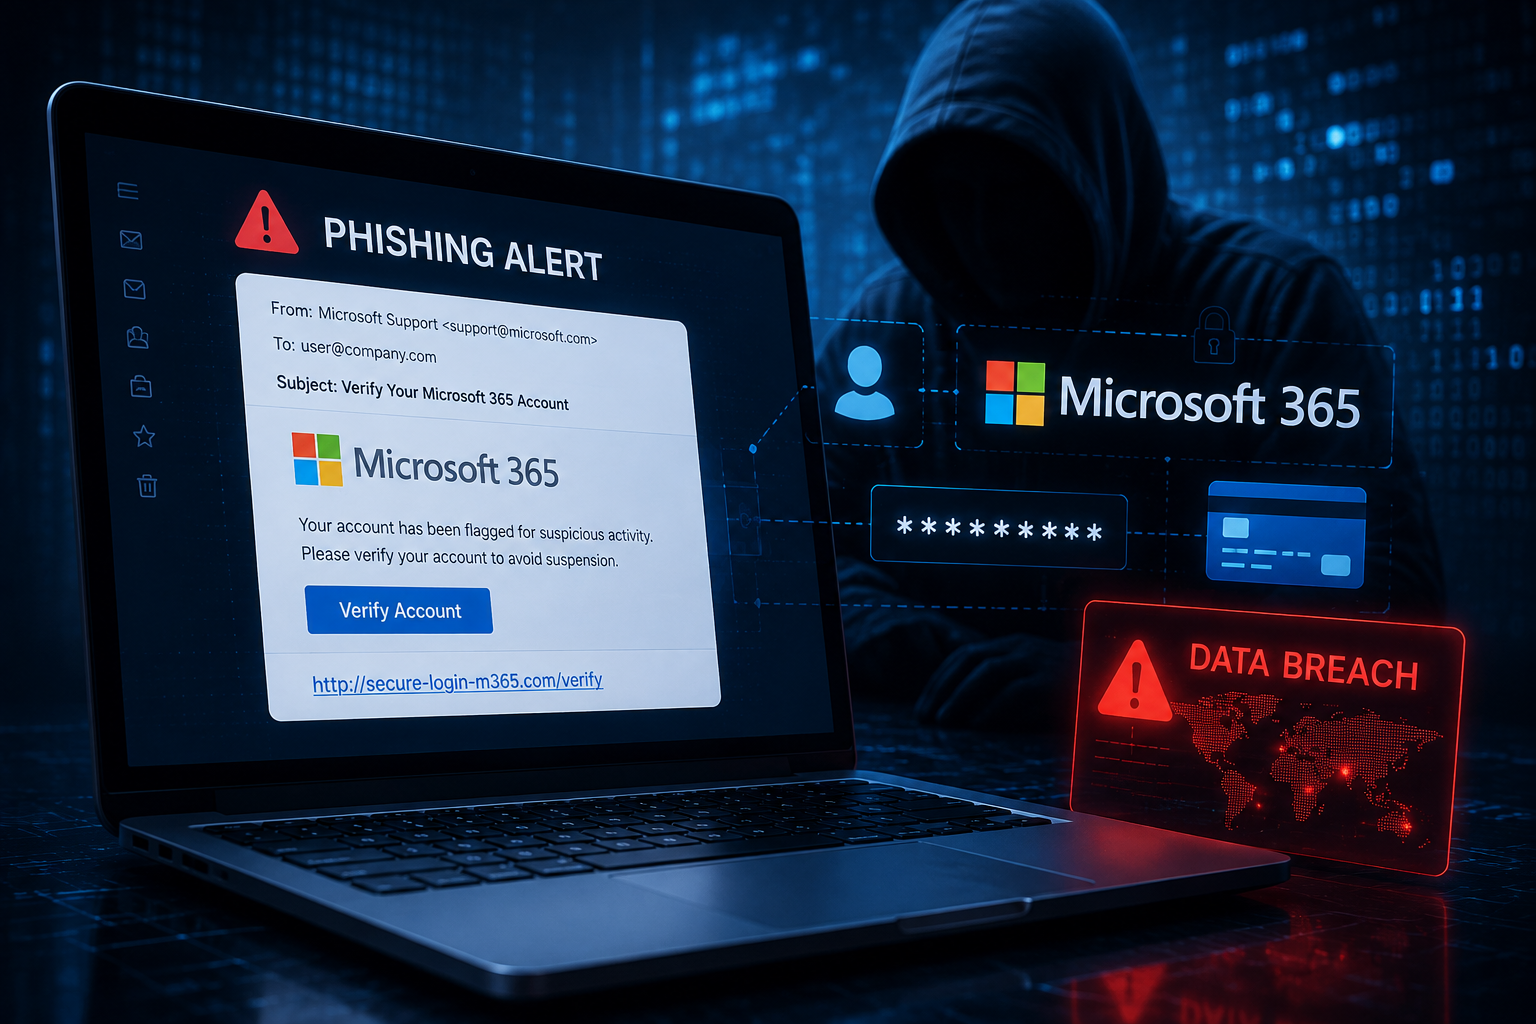
A phishing email can look completely legitimate on the surface. Attackers can copy company logos, imitate Microsoft 365 notifications, create convincing display names and use domains that look similar to trusted organisations.
But behind every email is a collection of technical information known as the email header.
Email headers can provide useful evidence about where a message travelled, which systems handled it, whether the sender's domain passed authentication checks and whether the visible sender information matches the underlying delivery information.
For cybersecurity students, SOC analysts and defenders, learning how to read these headers is a valuable practical skill.
In this guide, we will examine the most important parts of an email header and walk through a simple phishing investigation.
What Is an Email Header?
An email header is metadata attached to an email as it travels between mail systems.
It can contain information such as:
sender and recipient addresses
sending and receiving mail servers
timestamps
message identifiers
routing information
SPF authentication results
DKIM verification results
DMARC results
anti-spam information
Microsoft describes internet message headers as containing technical details about the sender, software and mail servers a message passed through.
The normal email interface hides much of this information, which is why a suspicious message can appear harmless until its full headers are examined.
Why Headers Matter in a Phishing Investigation
Imagine receiving an email displaying:
Microsoft Security security@microsoft.com
with the subject:
Urgent: Your Microsoft 365 password expires today
The display name alone does not prove that Microsoft sent the message.
An attacker may attempt to manipulate the visible sender information or use a similar-looking domain.
Header analysis allows us to investigate deeper.
We might discover:
the Return-Path uses an unrelated domain
SPF authentication failed
DKIM is missing
DMARC failed
the message originated from unexpected infrastructure
the visible From domain does not align with authenticated domains
unusual mail routing occurred
However, one important principle is:
No single header field should normally be treated as definitive proof that an email is malicious.
Microsoft notes that authentication failures are evaluated alongside other signals rather than automatically proving that a message is malicious.
How to View an Email Header
In Outlook, the exact process depends on the version being used.
For New Outlook and Outlook on the web, Microsoft currently documents:
More actions → View → View message details
For classic Outlook for Windows:
Open the email → File → Properties → Internet headers
Microsoft's official instructions provide additional details for each Outlook version.
When investigating suspicious email, work with the original message whenever possible rather than copying only what appears visually in the inbox.
Step-by-Step Phishing Email Header Analysis
Let's examine the major fields individually.
1. Check the From Address
Start with:
From:
For example:
From: "Microsoft Security"
The display name says Microsoft Security, but the actual domain is:
microsoft-support-example.com
That discrepancy should immediately receive further investigation.
Attackers frequently use display names and lookalike domains to impersonate trusted organisations.
Microsoft specifically recommends watching for mismatched domains and subtle domain misspellings when identifying phishing messages.
Do not inspect only the display name.
Check the complete email address and domain.
2. Examine the Return-Path
Another useful field is:
Return-Path:
Example:
Return-Path:
The Return-Path is associated with handling delivery failures and may differ legitimately from the visible From address, particularly when organisations use third-party email platforms.
However, unexpected differences deserve investigation.
For example:
From: accounts@trusted-company.example
Return-Path: attacker@unknown-mail.example
This does not automatically prove phishing, but it gives the analyst another indicator to investigate.
3. Analyse the Received Headers
Emails usually pass through several mail servers before reaching the recipient.
Each server can add a:
Received:
header.
A simplified example might look like:
Received: from suspicious-mail.example
by mail.company.example;
Received: from unknown-host.example
by suspicious-mail.example;
These headers create a routing trail.
When investigating them, analysts can look for:
unexpected sending infrastructure
suspicious hostnames
unusual geographic routing
unexpected IP addresses
inconsistencies between claimed sender and infrastructure
Remember that email headers are normally displayed with the most recently added Received header near the top. Investigation of the routing path therefore often involves reading the Received chain from the bottom upward.
Headers closer to the trusted receiving infrastructure generally deserve greater confidence than arbitrary fields supplied by the original sender.
4. Check SPF
SPF — Sender Policy Framework helps receiving systems determine whether a sending IP address is authorised to send mail for the relevant envelope domain.
Look for:
Authentication-Results:
You may see:
spf=pass
or:
spf=fail
Microsoft documents possible SPF results including pass, fail, softfail, neutral, none, temperror and permerror.
For example:
Authentication-Results:
spf=fail smtp.mailfrom=example.com;
A failure indicates that the sending infrastructure did not satisfy the SPF check for the evaluated domain.
But SPF has limitations.
Forwarding can legitimately cause SPF failures because the forwarding server may not be authorised by the original sender's SPF policy. Google specifically notes forwarding as a common reason SPF can fail even when SPF is correctly configured.
Therefore:
SPF failure = investigate further
not:
SPF failure = definitely phishing
5. Check DKIM
DKIM — DomainKeys Identified Mail uses cryptographic signatures to help verify that an authorised domain signed a message and that signed portions of the message were not modified after signing.
In the authentication results, you might see:
dkim=pass
or:
dkim=fail
Microsoft documents DKIM results including:
dkim=pass
dkim=fail
dkim=none
Also examine the signing domain:
header.d=example.com
For example:
dkim=pass header.d=trusted-company.example;
is more meaningful when the signing domain appropriately relates to the organisation represented in the email.
A DKIM pass alone does not prove that an email is trustworthy. Attackers can legitimately configure DKIM for domains they control.
Instead, ask:
Which domain authenticated the message, and does it align with the identity being presented to the user?
6. Check DMARC
DMARC — Domain-based Message Authentication, Reporting and Conformance builds on SPF and DKIM and checks alignment with the domain visible in the From header.
Possible results include:
dmarc=pass
and:
dmarc=fail
Microsoft documents these results in the Authentication-Results header.
Google also recommends reviewing message headers to confirm SPF, DKIM and DMARC authentication results when troubleshooting authentication.
Suppose we see:
From: security@trusted-company.example
Authentication-Results:
spf=fail;
dkim=none;
dmarc=fail;
That combination deserves significant attention.
But again, authentication is evidence—not the entire investigation.
7. Examine the Message-ID
Most emails contain a field similar to:
Message-ID:
Example:
Message-ID: <123456789@mail.example.com>
The domain or format of a Message-ID can sometimes provide contextual information about the system that generated the message.
Suppose an email claims to originate from one organisation but contains a Message-ID associated with completely unrelated infrastructure.
That could justify additional investigation.
However, Message-ID values are not strong authentication mechanisms and can be manipulated. Treat them as supporting evidence rather than proof.
8. Examine Authentication-Results Together
Rather than analysing SPF, DKIM and DMARC separately, look at the complete authentication picture.
A simplified example:
Authentication-Results:
spf=fail smtp.mailfrom=trusted-company.example;
dkim=none;
dmarc=fail header.from=trusted-company.example;
This tells us:
SPF: failed
DKIM: no valid signature was available
DMARC: failed
Microsoft 365 may also provide:
compauth=fail
Composite authentication combines multiple signals when evaluating sender authenticity. Microsoft documents pass, fail, softpass and none as possible composite authentication results.
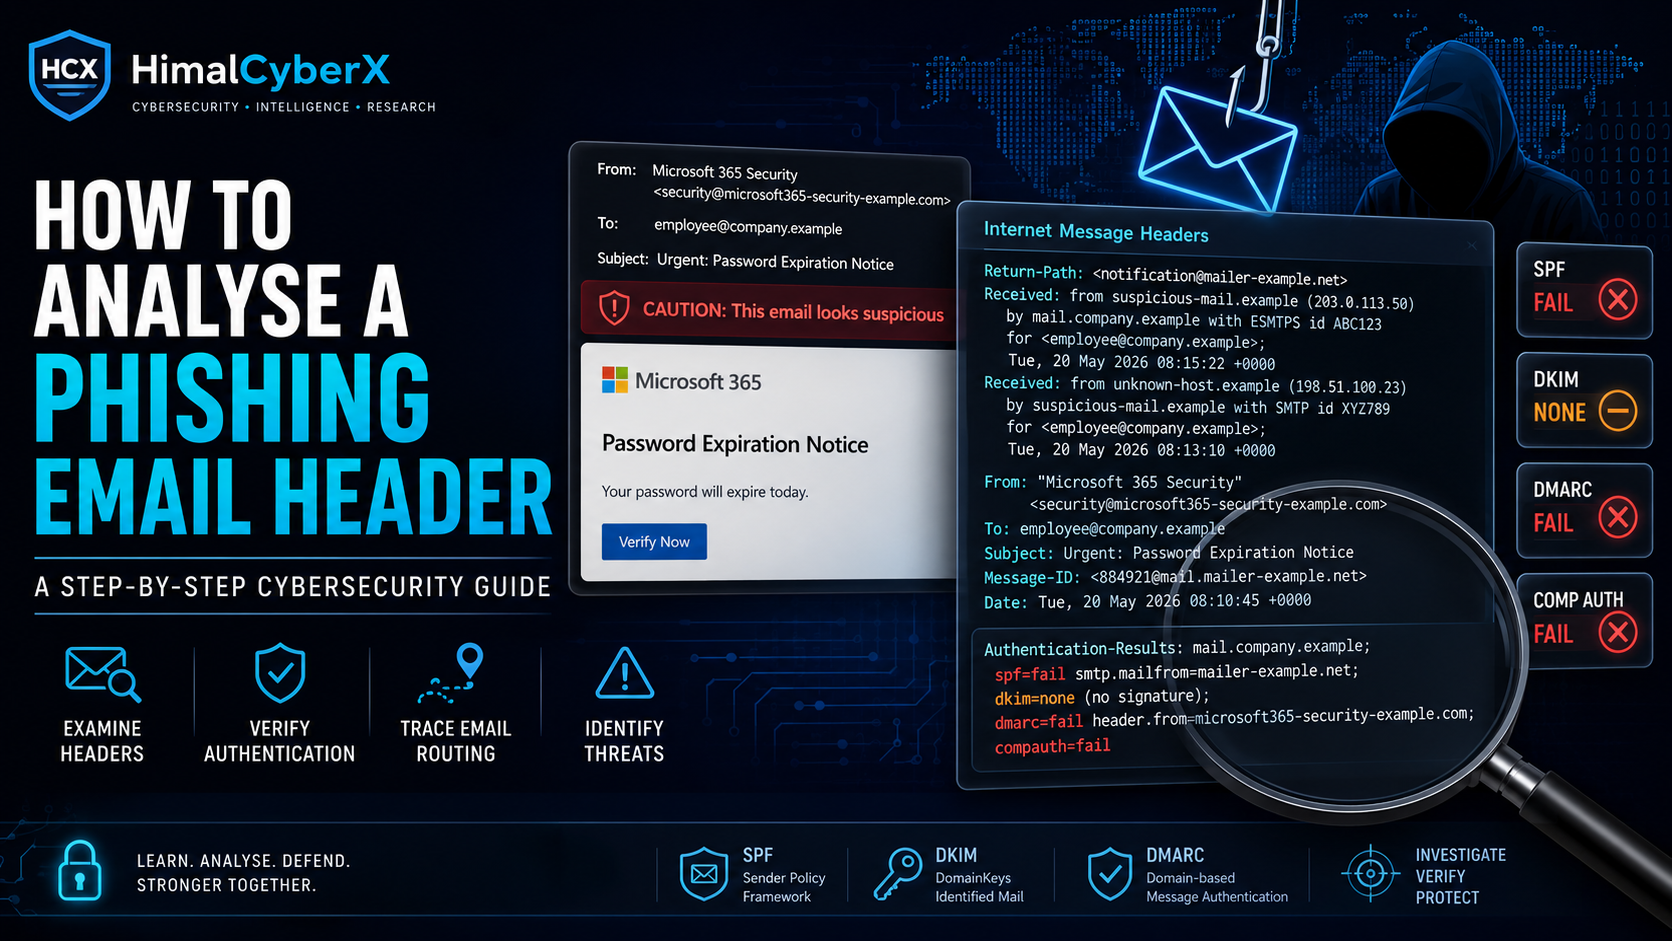
Practical Phishing Header Example
Consider this fictional training example:
From: "Microsoft 365 Security"
To: employee@company.example
Subject: Urgent: Password Expiration Notice
Return-Path:
Message-ID:
<884921@mail.mailer-example.net>
Authentication-Results:
spf=fail smtp.mailfrom=mailer-example.net;
dkim=none;
dmarc=fail header.from=microsoft365-security-example.com;
This example contains several indicators worth investigating.
Indicator 1 — Suspicious sender domain
The message claims to represent Microsoft 365, but the sender uses:
microsoft365-security-example.com
instead of an expected Microsoft-controlled domain.
Indicator 2 — Different Return-Path
The Return-Path points to:
mailer-example.net
This difference may be legitimate in some mailing architectures, but combined with other indicators it becomes more suspicious.
Indicator 3 — SPF failure
spf=fail
The evaluated sender failed SPF authentication.
Indicator 4 — No DKIM
dkim=none
No valid DKIM signature is present in this example.
Indicator 5 — DMARC failure
dmarc=fail
The visible From identity did not successfully satisfy DMARC authentication/alignment.
Taken together, these indicators would justify treating the email as highly suspicious and escalating the investigation.
Real-World Microsoft 365 Example
Email authentication continues to matter in modern phishing campaigns.
In January 2026, Microsoft described phishing activity that abused complex mail-routing configurations and misconfigurations to spoof domains.
Microsoft observed examples where headers contained combinations such as SPF failure, missing DKIM and DMARC failure, while routing configuration affected how the messages were handled.
This is an important lesson:
Correctly reading a header requires context.
An authentication failure may reveal spoofing, but mail forwarding, third-party gateways, connectors and configuration problems can also influence authentication results.
Investigating Domains and IP Addresses
If the headers reveal an unfamiliar domain or public IP address, analysts may continue the investigation using trusted threat-intelligence sources.
Useful questions include:
Is the domain newly registered?
Does the domain imitate a known company?
Has the domain appeared in security reports?
Is the sending IP associated with suspicious infrastructure?
Does the hostname match the organisation represented by the email?
Are there related phishing indicators?
Avoid interacting directly with suspicious links during investigation.
Do not paste sensitive corporate emails, tokens or confidential information into unknown public analysis services.
Common Phishing Red Flags
During an email investigation, look for combinations of indicators rather than relying on one clue.
Common warning signs include:
mismatched sender domains
lookalike or misspelled domains
unexpected Return-Path
SPF failure
DKIM failure or absence
DMARC failure
suspicious Received routing
unusual Message-ID domain
urgent password-reset requests
unexpected attachments
requests for credentials
suspicious login links
unexpected payment requests
sender identity inconsistent with the organisation being represented
Microsoft also recommends watching for urgent calls to action, generic greetings, mismatched domains and suspicious links when identifying phishing.
What Email Headers Cannot Tell You
Header analysis is powerful, but it has limitations.
A message can:
pass SPF and still be malicious
pass DKIM and still contain phishing content
pass DMARC when an attacker uses a domain they legitimately control
fail SPF because of legitimate forwarding
contain misleading attacker-controlled header fields
Therefore, analysts should combine header analysis with:
URL analysis
attachment analysis
sender reputation
domain intelligence
user context
authentication logs
endpoint telemetry
mail-security alerts
A successful authentication result means the message authenticated according to the relevant mechanism. It does not mean the content itself is safe.
What Should You Do With a Suspicious Email?
If you believe a message may be phishing:
Do not click links.
Do not open unexpected attachments.
Do not reply to the sender.
Verify the request through a separate trusted communication channel.
Report the email using your organisation's security process.
Preserve the original message if your security team needs to investigate it.
For Microsoft 365 and Outlook, Microsoft recommends using the built-in Report phishing functionality for suspicious messages.
Final Thoughts
Email-header analysis is one of the most useful foundational skills in phishing investigation.
Instead of trusting the sender name displayed in the inbox, examine the technical evidence behind the message.
Start with:
From → Return-Path → Received → Authentication-Results → SPF → DKIM → DMARC → Message-ID
Then combine those findings with the email's content, URLs, attachments and broader security context.
The most important principle is simple:
One suspicious header value is an indicator. Multiple related indicators tell the stronger story.
Learning to connect those indicators is what turns basic header inspection into a practical cybersecurity investigation.
References
For our site's References section, use these authoritative sources:
Microsoft — Anti-spam message headers in Microsoft Defender for Office 365
Microsoft — How email authentication works in Microsoft 365
Microsoft — View internet message headers in Outlook
Microsoft — Security Operations guide for email authentication
Google Workspace — Troubleshoot SPF issues
Google Workspace — Troubleshoot DMARC issues